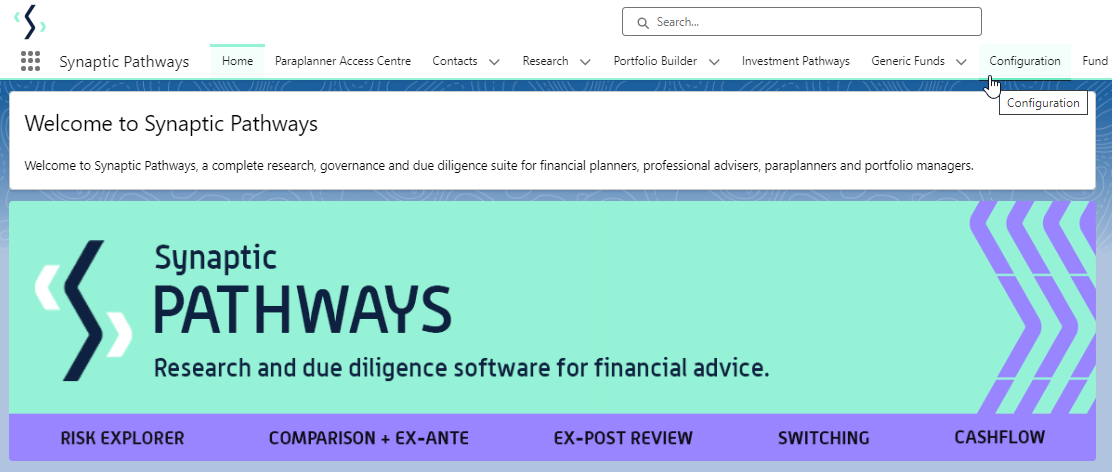
To create a special deal in Synaptic Pathways, navigate to Configuration in the navigation bar:
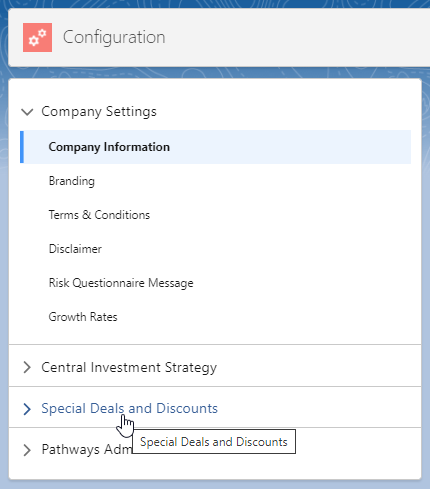
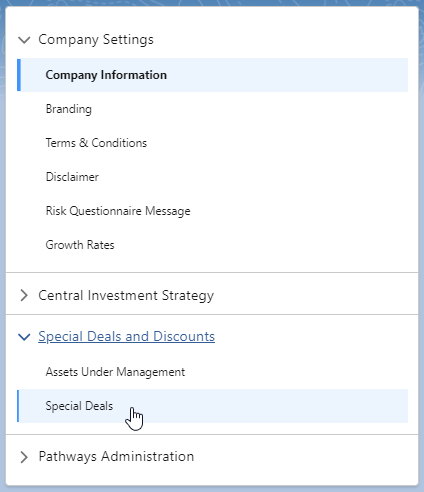
Click into Special Deals and Discounts, then Special Deals:
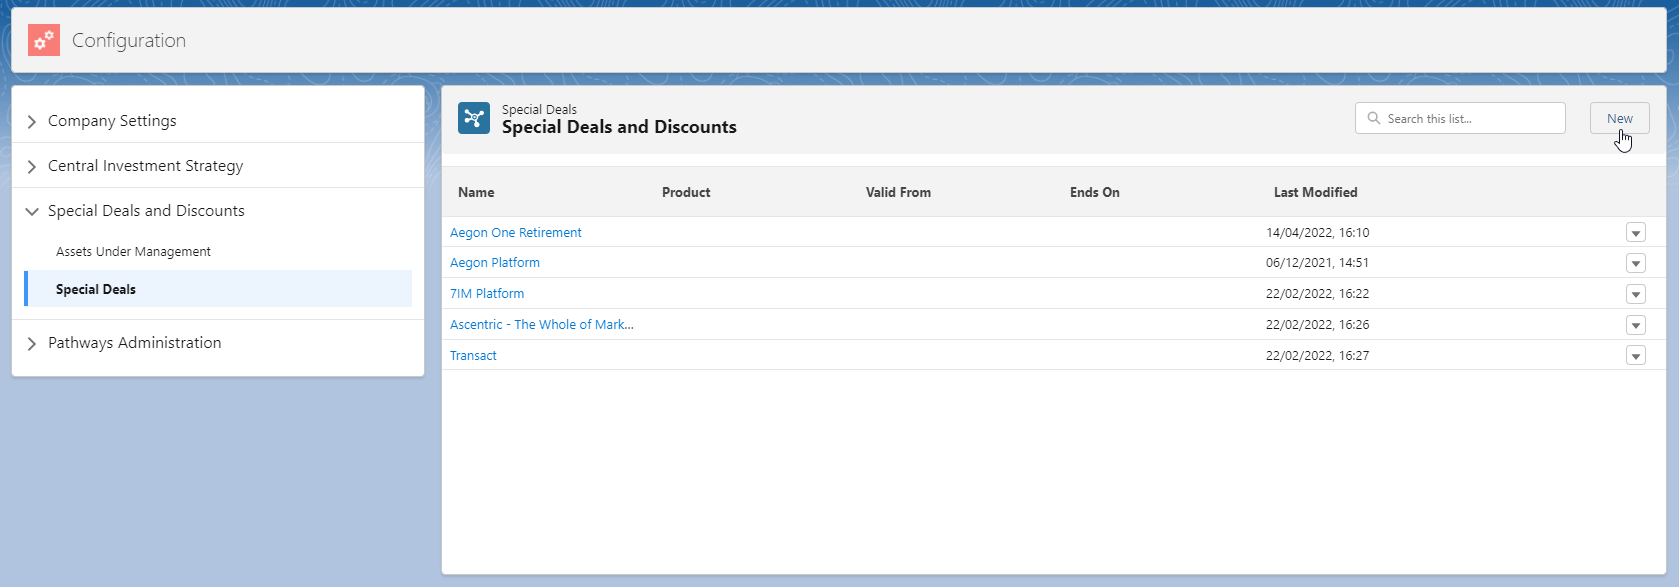
To create a special deal, click New:
Select whether you would like to create a platform or off platform special deal.
In this example, we will click Platforms:
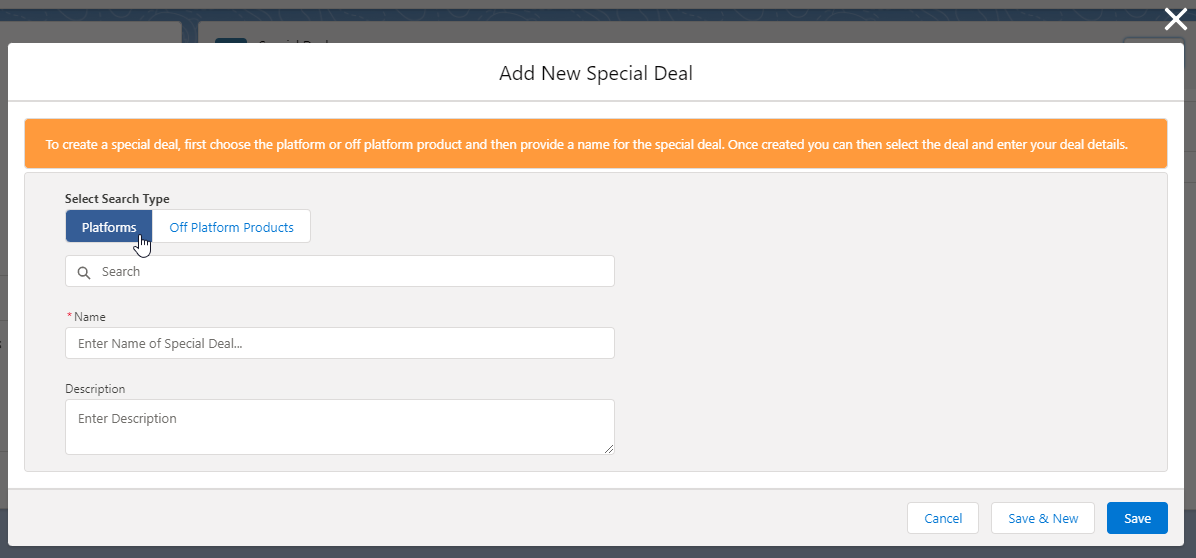
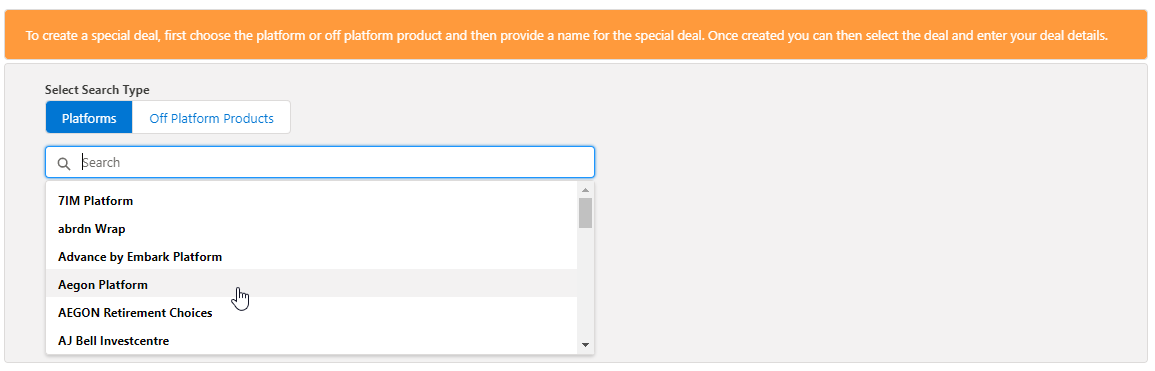
Select the Platform from the drop down:
Once selected, you are able to remove the platform if selected in error. If you are happy to proceed, you can either keep the default name of the deal or change it:
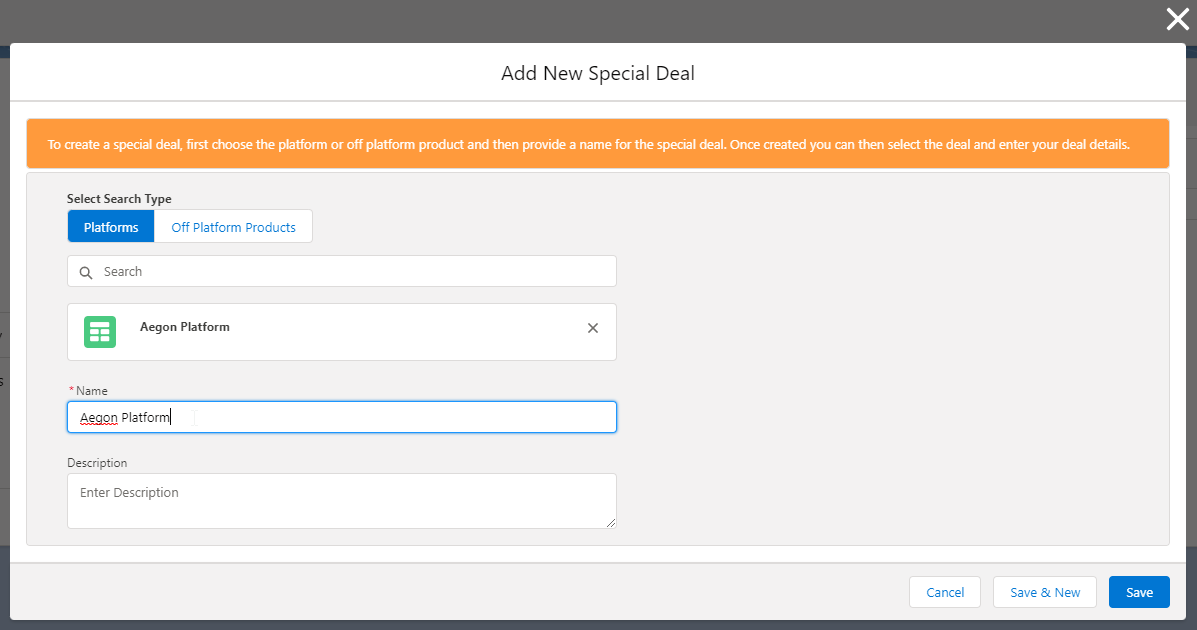
Once complete, Save:

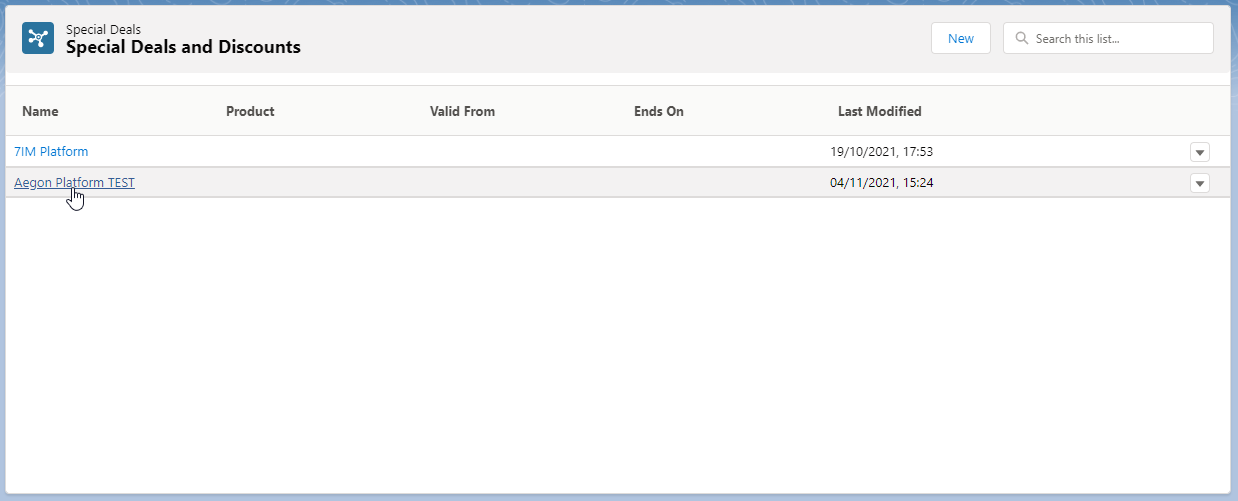
The deal has been successfully created:

To add the details of the deal, click into the record:
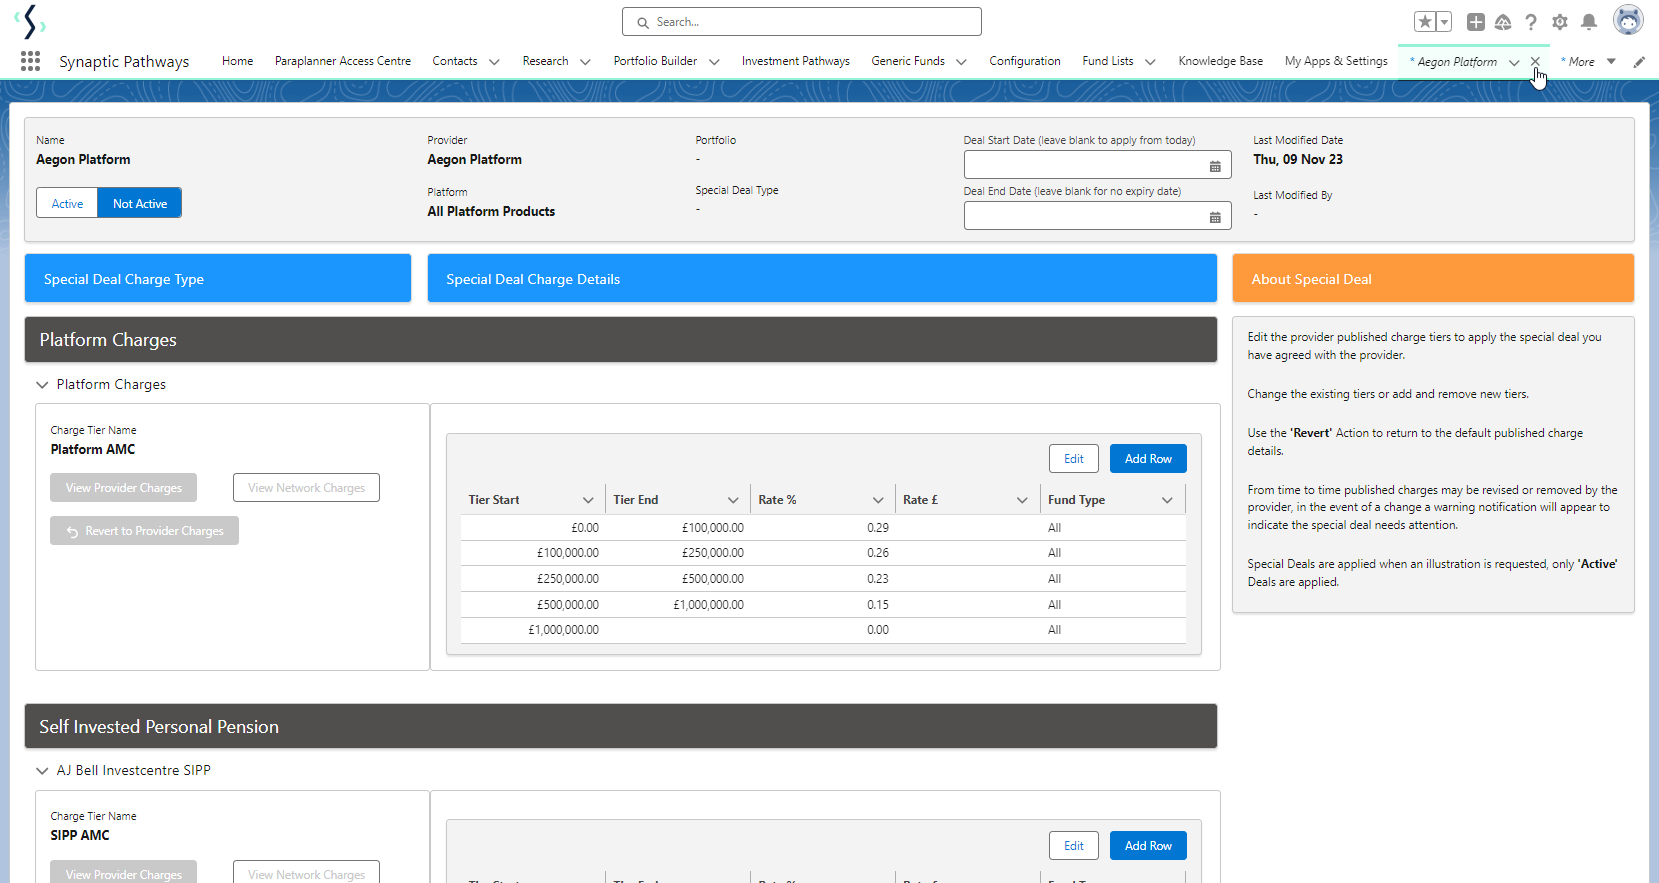
The deal will be Active by default. You can set Not Active it if you would rather edit & activate it at a later date. Enter the Deal Start Date (leave blank if starting from today) & Deal End Date (leave blank if there is no expiry date):
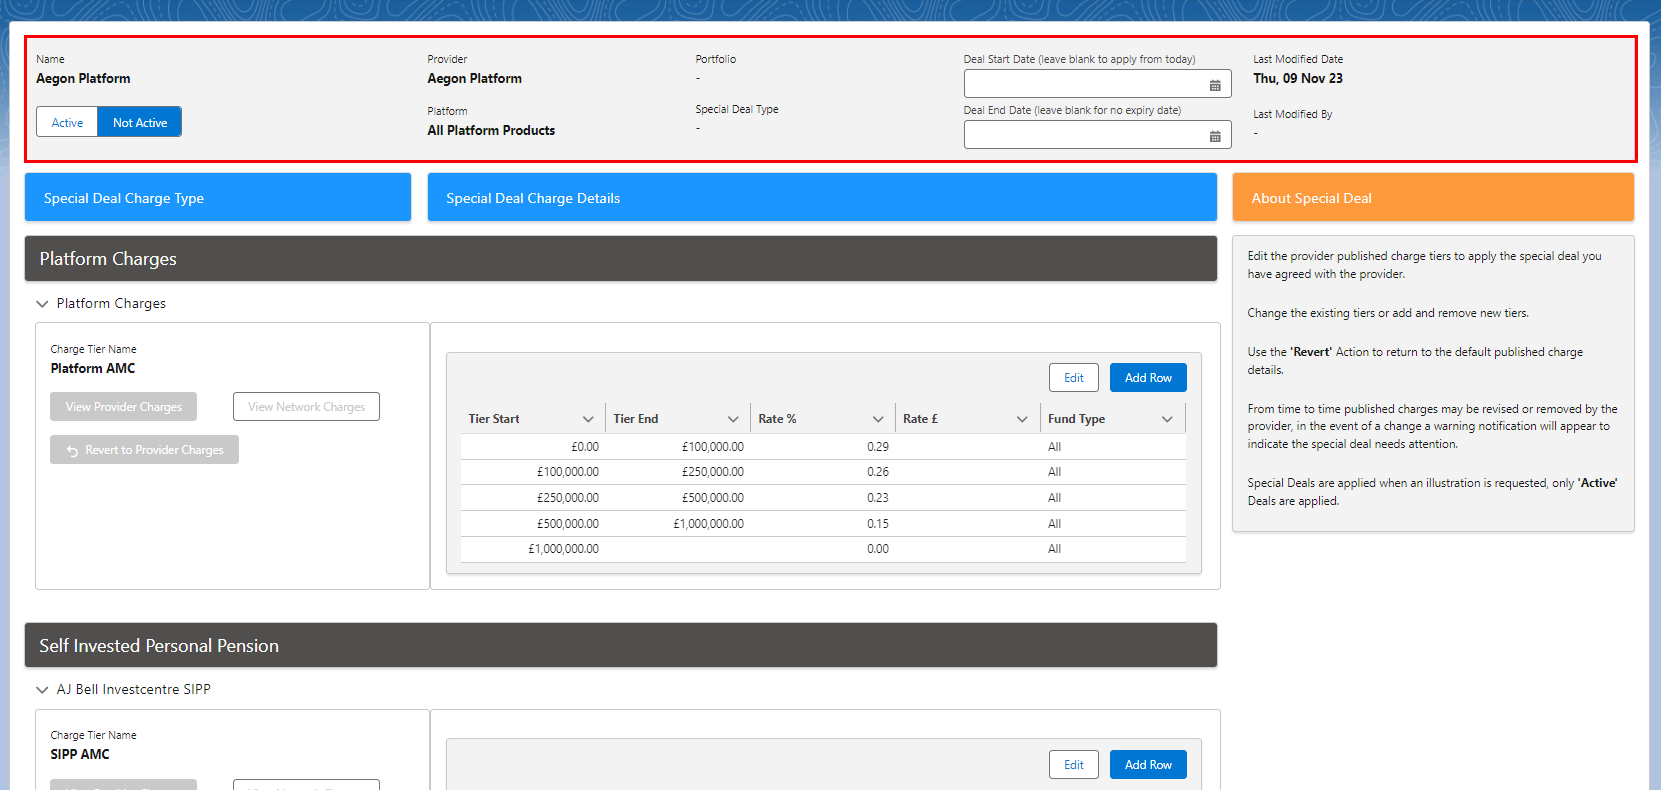
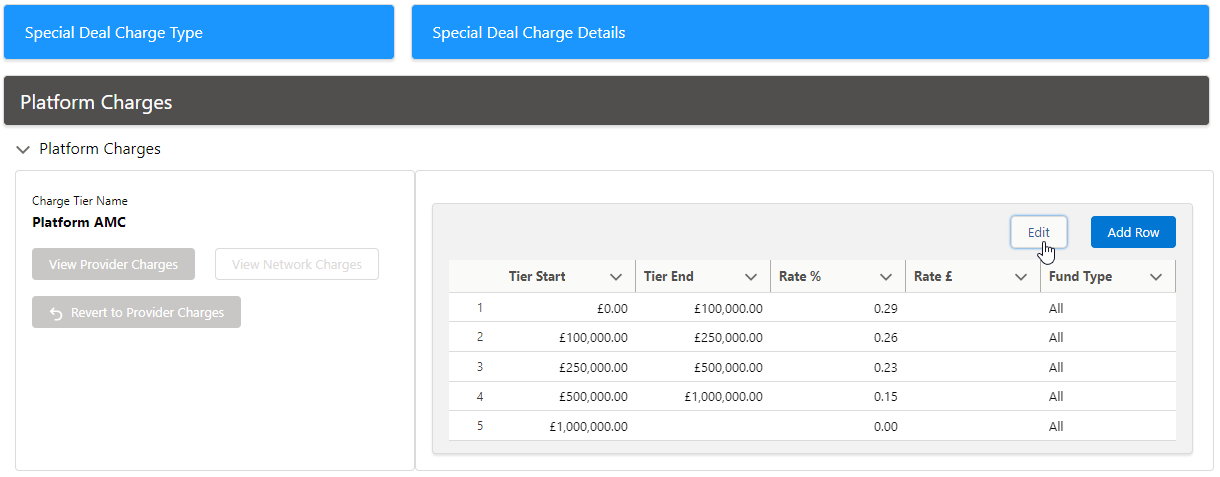
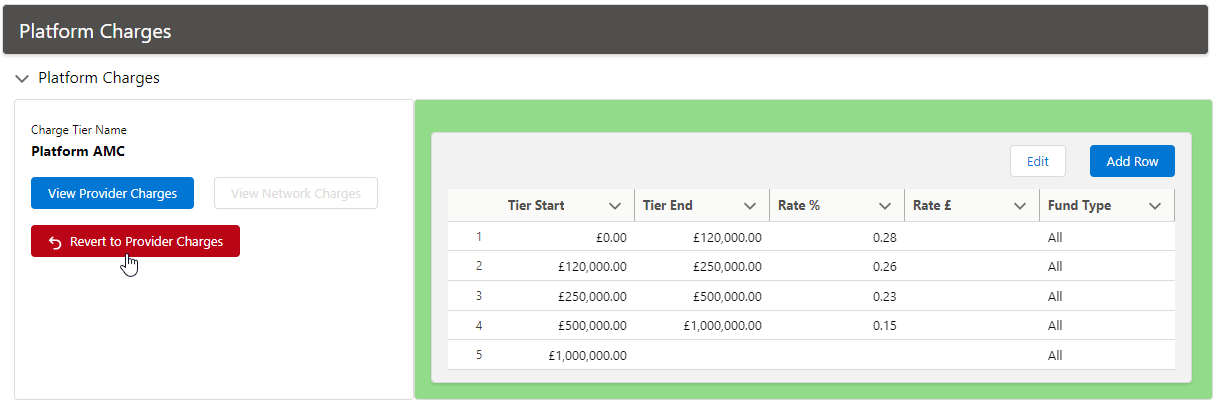
Charges will be broken down by Platform AMC and charges per product.
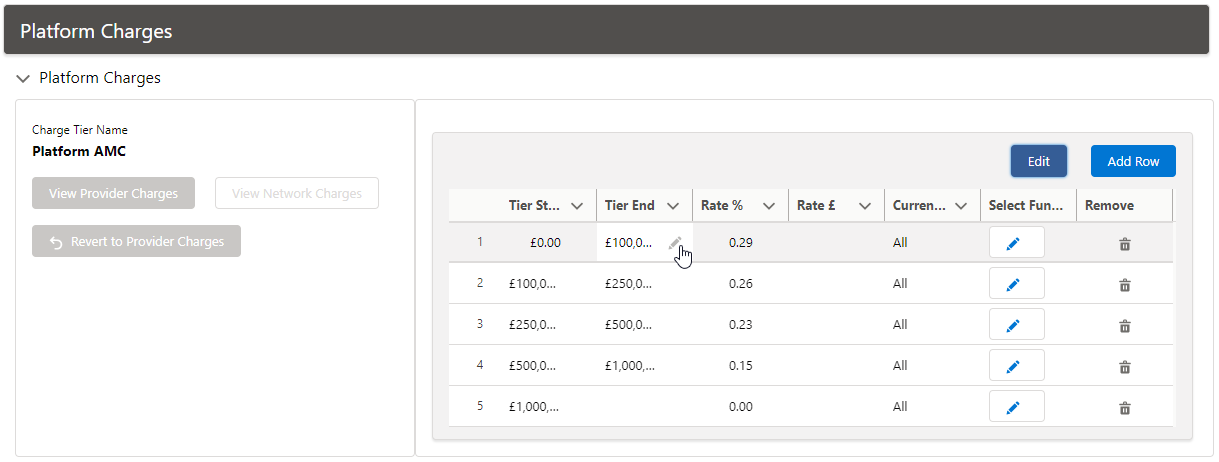
To add details of a special deal, click Edit
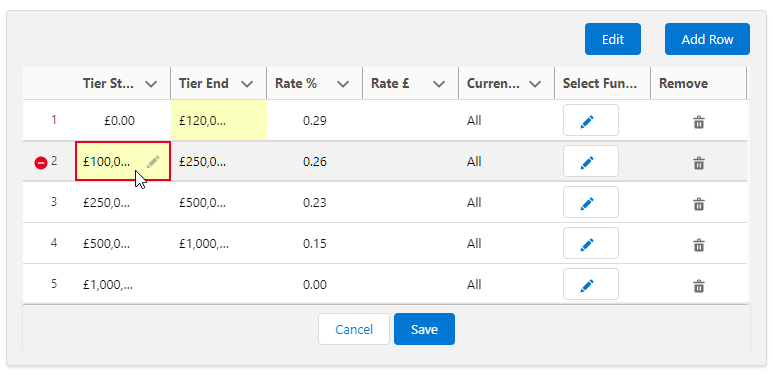
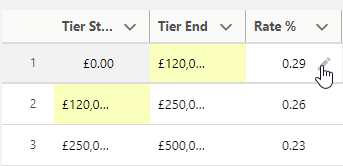
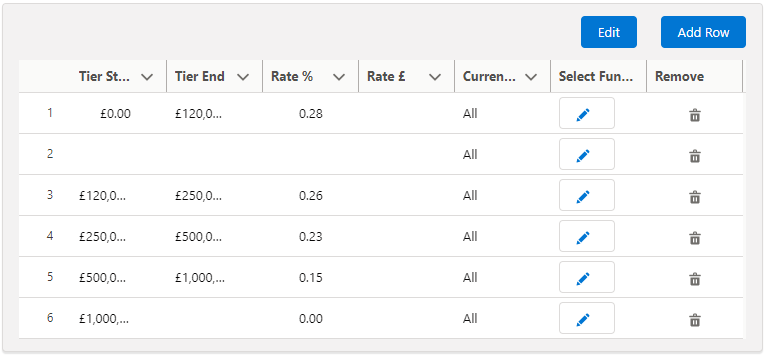
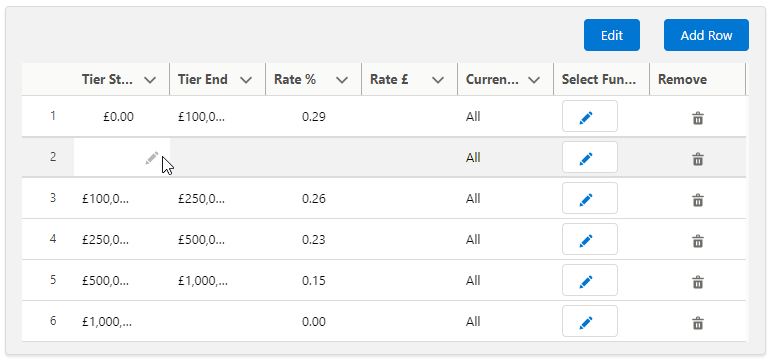
Amend the tiers by clicking on the pen icon next to the value you would like to update:
As you amend the tiers, you will need to make sure the remaining tiers start and end at the correct value:
As seen below:

Edit charge values by clicking the pen and update:
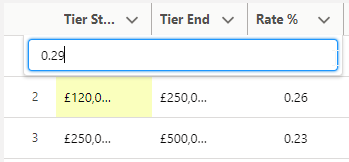
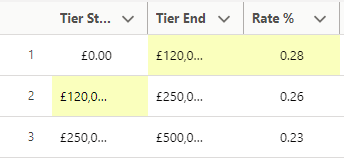
Note: Updated fields will be highlighted in yellow
Additional rows can be added through the Add Row button:
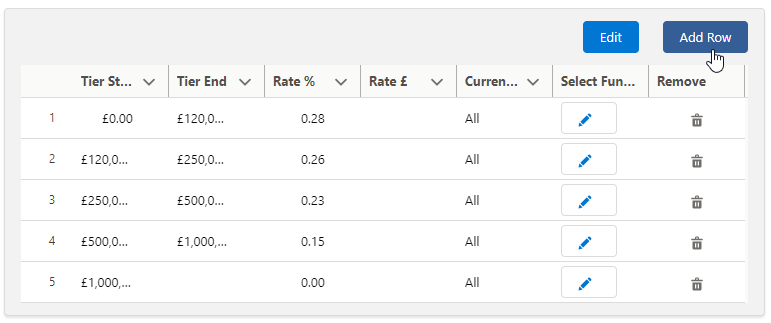
Complete the details by clicking into each field:
Once updated, the Special Deal Charge Details will be highlighted in green:
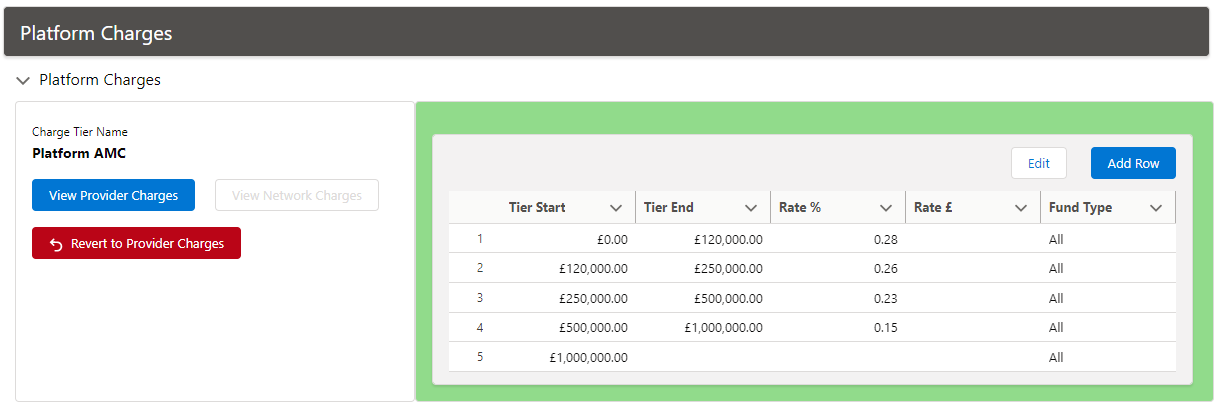
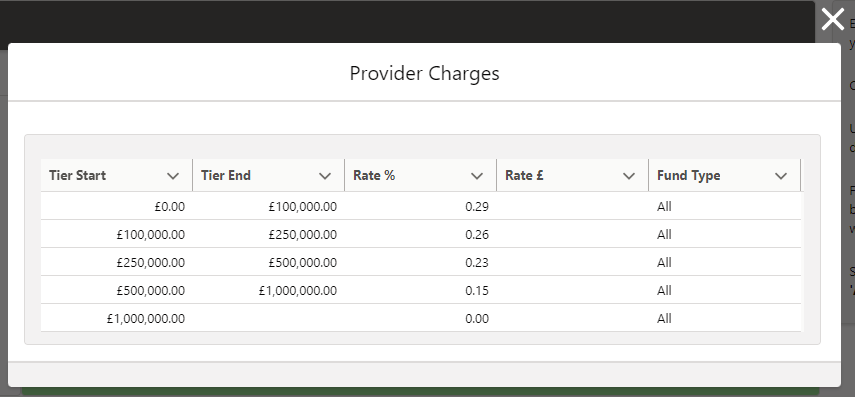
If you would like to view the original provider charges, click View Provider Charges
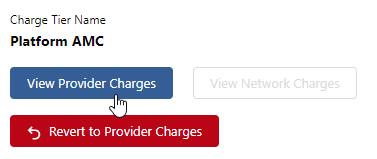
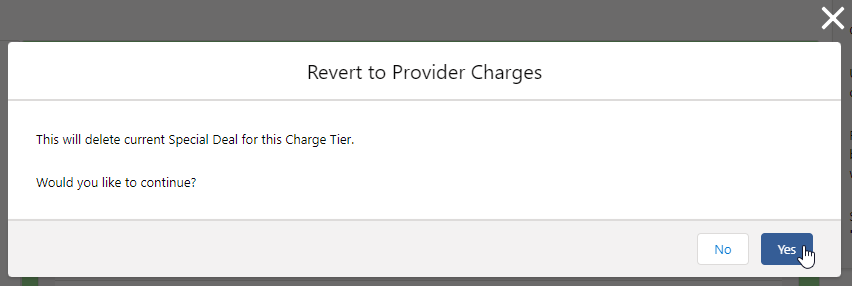
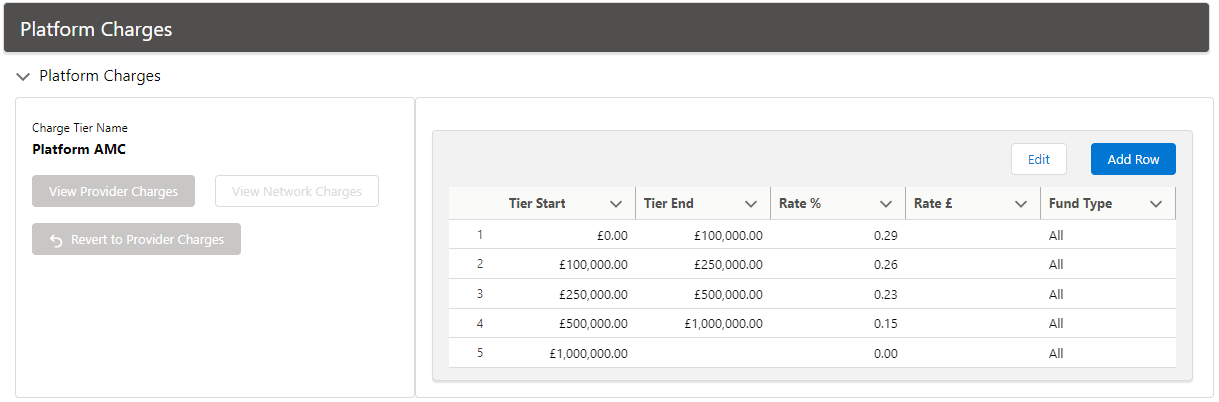
If you would like to revert the charges, click Revert to Provider Charges
When you have made the changes needed, are saved automatically. Click the cross next to the deal name in the navigation bar:
If you would like to view the special deal again, navigate back into Configuration> Special Deals and Discounts> Special Deals

