The section above describes how to add fields to the grid one-by-one. However, if you want to add lots of fields at once it is much more convenient to use the Field chooser– click on the Options link in the top right of the grid, and then click on Field chooser to display the pop-up window illustrated by the screenshot below. 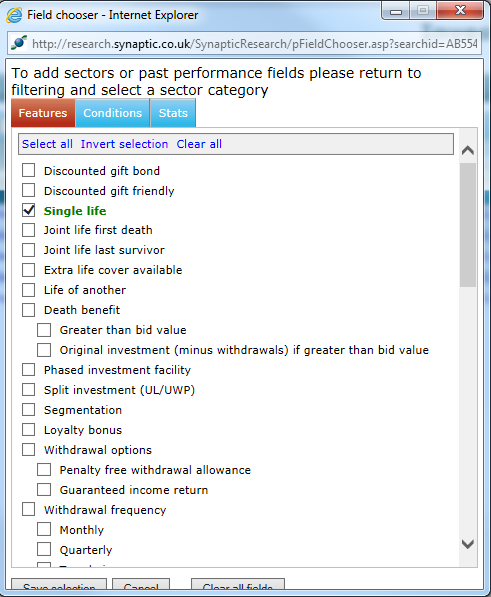 This simply lets you tick the fields you want to include in the grid. When you have finished, click on Save selection to add the fields. The pop-up Field chooser displays the available fields in the same tabbed groups as in the research grid itself. Within each group you have options to select every field, clear all current selections, and invert the current selection (i.e. select everything which is not currently selected, and vice versa). The Clear all fields button at the bottom of the window de-selects everything. It is equivalent to clicking on the Options link above the research grid and choosing Remove all fields. |
Comparing every aspect of the contracts
The Field chooser can be used to create a grid containing every single piece of available information about the contracts. However, this is not recommended. The resulting grid can be very large, and therefore relatively slow.
If you want to compare every aspect of the remaining contracts it is much more efficient to use the comparison tool described below.

